


 CPL Filter
 Micro SD Card
 Parking Mode Cable
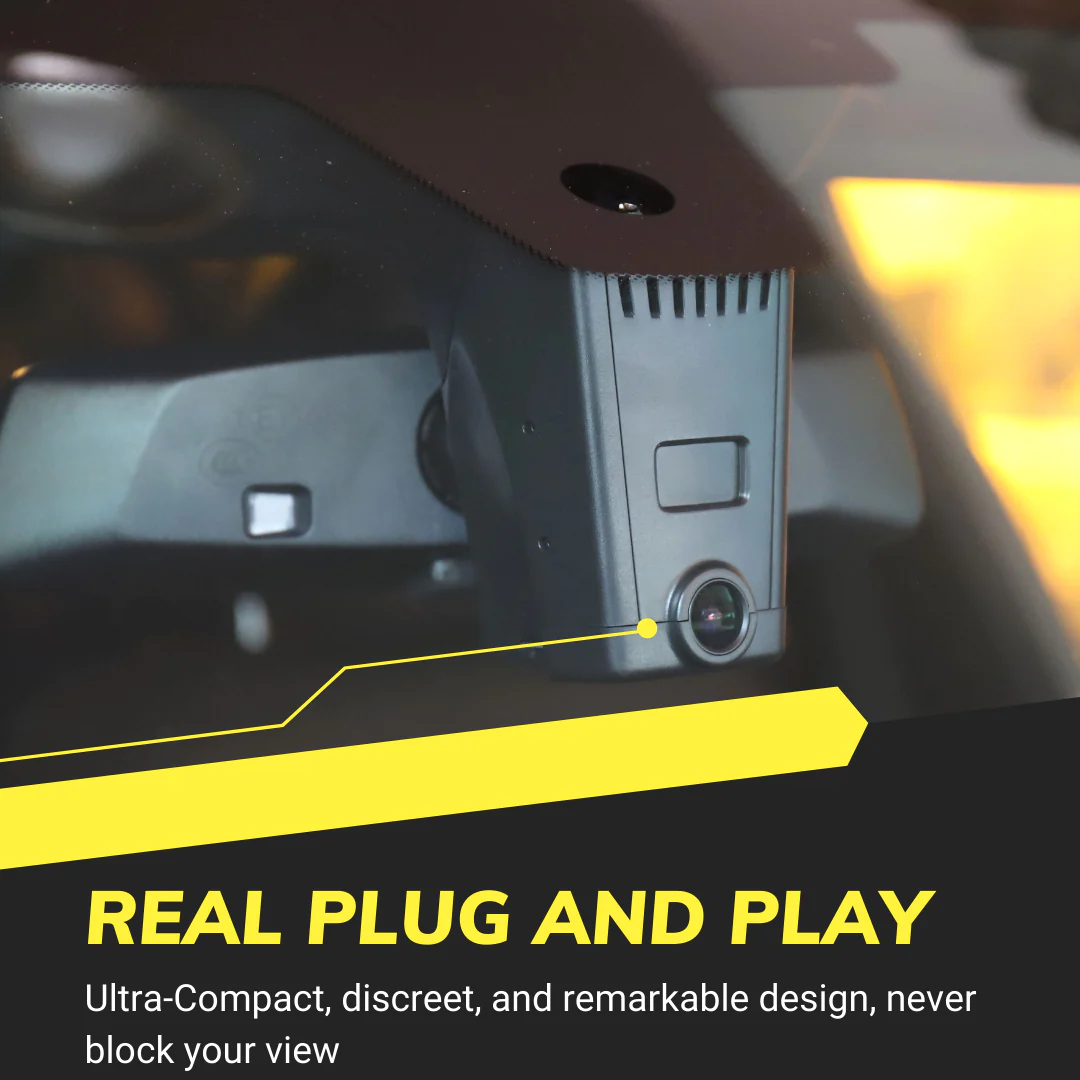
DashCamDirect DASH CAM INSTALL AND REVIEW
I live in Pennsylvania, Last month, I driving through the forest with my wife and suddenly a deer jumped out from nowhere. My old camera blocked my view as it’s stack on my windshield. Most people choose dash cam to be installed right on the windshield and they consider it OK because it is small enough. But I realized that way is so unreliable when emergency really appears because that is not appropriate from the dash cam shape to the dash cam installation. Therefore, it drove me to change a brand new one from DashCamDirect. It is installed right in front of the down-view mirror and below the top of the windshield.
By the way, you must buy the type by your car model otherwise it cannot be installed or result in unavailability.
I want to list the basic specs of the product and then show my experience of this special dash cam installation.
Specs:
camera: 4K 30fps
Storage: 32/64GB SD card ( expansion up to 128GB )
Processor: Novatek CPU
Built-in Wi-Fi
Sensor
DashCamDirect dash cam installation
First, I want to say that everyone is able to finish it by self. It is much easier than what you think. It just cost 10-20 minutes for most people. As far as I know, some normal dash cams are not strong and stable enough to be fixed on the windshield or somewhere else. But when you choose this one, the problem will be gone. Just imagine how it is possible to fall when the dash cam installed in the cover. The steps of installation are here:
Step:
Remove the panel or cover behind the mirror carefully. The panel are not usually fixed by screws but a clip-on structure. Generally, it can be just pushed forward and removed. The tools will be in the package if they are necessary for dash cam installation. If you really get confused for that, you can easily get them in the shop or supermarket or just inquire DashCamDirect technicians.

- When you completely remove it, you can see many wires or there. Don’t get nervous! Put the camera on the position and then fix it tight. This time your it should be installed on the head but this is not finished. Then you need to find a port there and then connect them. Be careful, if you notice that it can’t be connected, maybe that’s because you bought the wrong model or you connected the wrong port.

- When you make sure the wires are plugged, reinstall the panel to the original position. That part of it is placed by your dash cam now.

- Insert the SD card and start the engine. The camera will start automatically. Remember shut down the engine when you install or it could result in an alarm or fault report.

A DashCamDirect dash cam installation should be successfully finished at this moment. Then let us talk about the performance, the 4K 30fps is enough to deal with complex recording conditions. The picture is sharp and clear. The G-sensor can detective the variability of gravity, when the car is braked or crashed, the camera will lock the present video and take photos. And due to the special dash cam install position, it’s very valid and stable whenever the car is shaking. It is still easy to distinguish everything in a night driving. Stabilization is very reliable as I barely see the obvious shaking of pictures. Then when you want to check the videos, you just download the app informed in instruction. The WiFi will make sure that you can check all the videos on the smartphone.
Actually, you will ignore it when driving because it does not occupy any other places on the windshield. Only when standing in front of the car can you see a camera lens. And it is installed in the structure of the car and it really solves the problem when you feel that there is something disrupting you eyes. Maybe sometimes you even forget that cam on your car.
After the first time you start it, you don’t need to shut it down. The power is from the car electricity. And after being started it will start automatic recording.